The Toddler Room – Craft & Art Ideas for Little Hands and Big Imaginations
**Some crafts may require Hot Glue and other potentially dangerous items – ensure appropriate supervision when crafting with your toddler!**
Halloween Crafts | Fall, Thanksgiving & Christmas Crafts
MY OWN FALL COLORING PAGES:
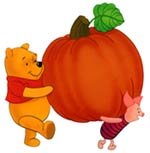
Fruits & Vegetables of Harvest Time
STUFFED PAPER BAG TURKEYS
What You Need
Scrap Construction Paper
Newspaper
Glue
Crayons
Scissors
How To Make It
1. Stuff the paper bag with newspaper, leaving about 3 inches to fold shut. Try to fold it so both ends look the same then glue it shut.
2. Cut out feather shapes and glue onto bag.
3. Draw and cut out turkey head and neck; making two tabs where the base of the neck will be.
4. Fold one tab forward and one tab back and attach it to the bag.
HANDPRINT TURKEY
What You Need
printer (optional)
paper (construction paper or another heavier paper is best)
scissors
glue
googly eyes (optional)
crayons/markers and/or paint
How To Make It
Trace around child’s hand at the bottom of the paper. This will be the Turkey’s tail.
Colour or paint hand print.
Draw and cut 2 small circles for the eyes,
a triangle beak and
a “gobbler“
Cut a peanut shape out of brown paper for the body
Glue “peanut” body to the center of the handprint
Glue googly eyes and small circles for eyes
Glue on Beak and “Gobbler”
Print or Write Out poem above, below or around the Turkey
POEM:
This isn’t just a turkey as you can plainly see.
I made it with my hand which is a part of me.
It comes with lots of love especially to say,
I hope you have a very, Happy Thanksgiving Day!
FALL PLACEMATS
What You Need:
2 Sheets of clear Con-Tact paper, placemat size
Scissors
Leaves
Waxed paper
Large book, Dictionary, or Encyclopedia
How To Make It
Gather some fall leaves.
Place each of the leaves between 2 pieces of waxed paper.
Place the leaves inside a large book to flatten them.
After the leaves are flattened, take them out of the book and remove the waxed paper. This may take a day to about a week.
Peel the back off of one of the sheets of clear Con-Tact paper.
Place sticky side up on your work area.
Arrange your leaves on the Con-Tact paper in any way desired.
Peel the backing off of the other sheet of Con-Tact paper and carefully place on top of the leaves.
You can trim around the edges or use decorative scissors to give it a different look.
HANDPRINT WREATH
What You Need
Coloured construction paper, paper bags or coloured paints (oranges, reds, browns for Fall or reds, greens and white for Christmas)
There are two ways to do this craft. One is to trace the child’s hand onto paper and cut out the prints. The second is to make paint handprints on the paper and cut those out.
How To Make It
Make nine handprints (3 of each colour).
Cut out the prints and glue to form a wreath.
You can decorate the wreath further with pictures (like leaves, pumpkins or corn). These can be: stickers!
hand drawn artwork by the children,
pictures from colouring books, magazines .
HAND & FEET TURKEY
What You Need
Construction paper — brown, tan, orange, red, yellow and white
Scissors
Glue
Wiggle eyes, optional
How To Make It
1. Trace the child’s hands and feet — two feet (with shoes on) on brown construction paper; two hands on tan construction paper; two hands on red construction paper; two hands on orange construction paper; and one hand on yellow construction paper.
2. Cut out all the pieces.
3. Put the two feet tracings together to make the turkey body and head, matching the heels together, and spreading the bottoms apart. Glue.
4. Cut two feet out of the orange scraps, and cut a diamond shape for the beak. Draw the eyes on white paper and cut them out, or use wiggle eyes. Make the wattle out of red construction paper. Glue them onto the body.
5. Glue the red, orange, and yellow construction paper hands behind the brown body to make the tail.
6. Position the two tan hands to either side to make the turkey’s wings and glue them in place
REINDEER FOOD
What You Need
Oatmeal
Un-Popped Pop Corn ( magic corn 🙂 )
Glitter
Small zip baggies
Ribbon
How To Make It
1.Pour about 1/8 cup of oatmeal in snack-size baggie.
2.Add some glitter and the “magic corn”. Close the zip baggie.
3.Attach a message with ribbon (or glue) to
the front of the baggie
REINDEER FOOD POEMS
The big day is coming,
Santa’s on his way.
His reindeer are busy
pulling the sleigh.
They are going to be hungry,
so give them a treat.
Sprinkle this reindeer food
on the front lawn
for them to eat!
OR
Sprinkle on the lawn at night
The moon will make it sparkle bright
As Santa’s reindeer fly and roam
This will guide them to your home
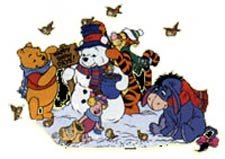
FROSTY SNOWMEN
What You Need
Styrofoam balls in two or three sizes
Small black pom-poms
Felt
Scissors
Styrofoam glue
White tempera paint
Glitter
Toothpicks
Floral foam
How To Make It
Decide which ball will be the “base” of your snowman and cut about 1/2″ off the bottom so your creation can stand. **Paint and glitter Styrofoam balls using the technique outlined below. When paint is dry, stack balls with toothpicks, using Styrofoam glue to hold them together. Dress the snowmen with hats, scarves, earmuffs, and other winter gear cut from felt. Add black pom-poms for eyes and mouth.
**Painting the styrofoam balls is optional but makes for a “prettier” craft. If doing this craft with your toddler, you might want to “pre-paint” the balls or skip the paint altogether**
HOMEMADE SNOW GLOBES
(This is more of an “advanced” craft however our kids LOVED helping to create their snow globes! With proper supervision, this is a wonderful craft that will bring squeals of delight from your toddler when the project is finished and they are able to shake up the snow!)
What You Need
Baby food jars, washed and with labels removed
A bag of glitter
Glycerin or baby oil
Small figurines (about 1.5” tall)
Glue
Felt
Paint to match felt
Pretty ribbon or cord
Permanent Marker
How To Make It
Paint the outside rims of the baby food jar lids the same color as the felt. You don’t have to paint the bottom, as these are getting covered with felt.
Cut the felt into circles approximately 2-1/4 inches in diameter. Glue the felt to the bottom (outside) of the baby food jar lid.
Flip the lid over and glue the figurine in upright to the inside center of the baby food jar lid. Make sure that the figurine will fit all the way into the jar with the lid screwed on before gluing it in! A hot glue gun works especially well in gluing the figurines upright into the lid.
You should now have a baby food jar lid, with a painted edge and felt glued to the bottom. When the felt side is down, there should be a small figurine glued standing upright on the lid.
Pour about 2 teaspoons of glitter into the baby food jar. Fill ¾ of the way full with glycerin or baby oil. Don’t use water, as the oil is thicker and causes the glitter to fall more slowly. Slowly screw the lid onto the jar. Your figurine should now be hanging upside down in the jar, in the oil, with the felt on top. Make sure the lid is screwed on very tightly.
Use your pretty ribbon or cord to tie around the base of the lid as a finishing touch. The permanent marker can be used to write your child’s name and date on the bottom of the felt, with a message if desired.
Flip the jar over. The “snow” should fall slowly over the figurine.
CANDY CANE FRAME ORNAMENT (with or without photo)
What You Need
Candy Canes (small or large)
Glue
Felt
Ribbon
How To Make It
Form a heart with two candy canes; glue together at both top and bottom. Let dry, then run ribbon through the heart and glue to the top of the candy canes to secure.
Trace heart’s outside edge onto two pieces of felt and cut out. In one heart, cut an oval or square window. Line up photo in window, and glue in place between the felt pieces; let dry.
Glue candy canes to felt; decorate with glitter.
PAPER PLATE WREATH
What You Need
White or Green Paper or Plastic Plates
Tissue Paper (Red, Green)
Glue
Ribbon
How To Make It
Cut the the tissue paper into 1 to 2 inch squares. This can be done by adults prior to crafting.
Cut the center out of the paper plate to leave a round “donut” shape. This will form the base of the wreath. Again, this can be done prior to craft time.
Scrunch the pieces of tissue paper into balls. You can do this on the end of a pencil to make more of a flower shape or you can just make a ball with your fingers.
Glue around the paper plate to make the wreath.
Tie a bow with the length of ribbon and glue it to the top of the wreath.
HOLLY WREATH
What You Need
Paper plates
red and green construction paper
glue.
How To Make It
This one is quick and easy. Cut a circle out of the centre of a paper plate. Decorate the outer circle with cut out holly leaves from green construction paper. Add small circles of red construction paper for berries. Hang by a string.
EASY STAR ORNAMENTS
What You Need
Cardboard
Felt
Glue
Sequins Glitter or other Baubles
How To Make It
Cut star shapes out of card board and felt. Glue felt onto card board piece. Edge star with glued on sequins